Price: RM7X (varies)
I initially wanted to get an original Bandai one much earlier on but budget was focused more to my gaming needs so this is what resulted from it. I actually almost completely skipped this gem of a Gundam. Truth be told, I would still want the original but I'll leave that to a time when my funds are plentiful again for Gunpla. Nonetheless, this bootleg is actually worth-while to build as Gao Gao (AKA TT Hongli) keeps on stepping their game up.
Note: Will add on some more in a while.
EDIT (2/2/12): Manual scans can be found HERE.
Read on!
Section 1: Box
Due to obvious copyright issues, details on the box are minimized greatly.
Section 2: Box Open!

 As usual, Gao Gao shows us how environmentally friendly they can be by packaging the runners in the least amount of plastic bags possible - at the cost of the runners scratching one another.
Section 3: Manual Scans
You can see the manual scans HERE.
Section 4: Runners
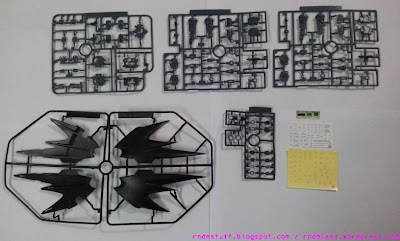
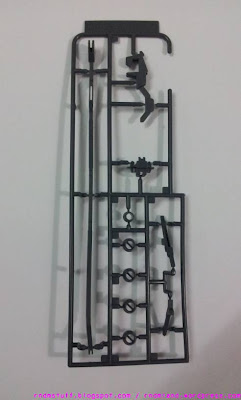
For an MG costing 4800 (Bandai original), it does indeed have a lot of runners going for it.
Details and plastic quality gets a thumbs up from me. Not Bandai-level but decent enough for a bootleg.
Note: Gao Gao doesn't seem to use ABS plastic for parts that are supposed to use them, well, they aren't labeled as such.
Note: Gao Gao doesn't seem to use ABS plastic for parts that are supposed to use them, well, they aren't labeled as such.
Section 5: Building Process
As with any bootleg, prepare necessary tools like knife, superglue/cement and whatever else you may need. You may need a decent amount of strength while putting parts together.
Reinforcing means using the superglue-trick or something similar to add more friction for two connecting joints. Superglue-trick is done by letting a layer of superglue dry on a peg before connecting it back. Naturally it will add more friction to the connecting joints allowing a more firm joint connection.
However, for this bootleg MG, it was relatively painless to build. No extra cutting was needed as far as my experience with it went. Only some cementing was necessary.
Section 5.1: Torso
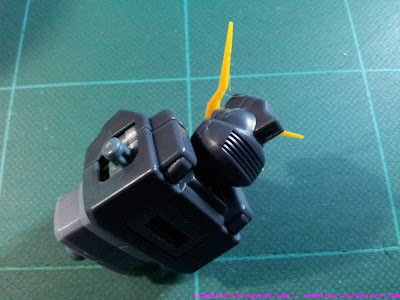
Interestingly, building the torso was a breeze. Only the neck area posed some problems but a little bit of additional force was enough to make it work out.
Note: Did not put the pilot in the cockpit - something I usually do.
Note: Did not put the pilot in the cockpit - something I usually do.
Section 5.2: Head
The head... has problems. You'll need some superglue/cement for the mouthpiece as they don't stick on well as well as the "sideburns" feel a little loose. Adjusting the face will eat some time as well since the way it is put together feels non-bootleg-friendly. ^^;
Section 5.3: Arms
White "claws" on the shoulder armor are movable. No construction problems here.
Arm-guard. No problems, by itself at least, here.
Due to a recent design decision, the fingers are non-movable and rely on part switching. More weapon friendly but doesn't seem that reliable for this bootleg as it feels loose. Maybe a superglue-trick will help - if you need the additional grip later.
Note: Arm-guard is slightly loose once connected. Not so loose but you may need to use the superglue-trick if it falls off frequently enough. I haven't actually experienced that but I feel it is a possibility.


Section 5.4: Legs
I highly suggest to superglue/cement the toe-section of the feet as it feels like the two parts are going to come off every time the toes are moved.


The white "claws" for the knee are rather hard to put through nicely for this bootleg but it is possible. Took me some time to actually do it though. =_=;
Katoki's sense of proportions are fabulous. Legs felt quite sturdy once everything are put on.
Section 5.5: Waist
You'll need to superglue/cement the gray pieces on else they will pop out when you move the waist armor. I almost did. The rear skirts seem to need reinforcement as well since the joint mechanism has a small connecting headroom.
Section X1: Without Active Cloak
Once you overcome the flaws stated above, the bootleg Deathscythe can stand up pretty well.
Section 5.6: Active Cloak
After building this, I felt like I had a Batarang in hand. Of course, I would be a fool to actually throw it but it is very sharp since the sharp points are thinner on this bootleg - me gusta. The problems on the Active Cloak are quite minor but it doesn't hurt if you decide to superglue/cement the halves for additional integrity though.
I suggest using superglue/cement on the two red "claws" and using the superglue-trick for the peg connecting to the back as it isn't tight enough.
I suggest using superglue/cement on the two red "claws" and using the superglue-trick for the peg connecting to the back as it isn't tight enough.
Section 5.7: Beam Scythe
Scythe is quite hollow and light which is good for holding but looks rather crappy to see, unfortunately. You may or may not need superglue/cement on some of the small connecting parts here. Beam goes in nicely though.
Section X2: Preview - "Those Who Have Seen Me..."
Note: I reinforced the torso ball joint connecting to the waist in order for the bootleg Deathscythe Hell Custom to stand firmly with the Active Cloak opened up. You can try this as well!
To be continued...


3 comments:
just curious how much this cost ? quarter Banda's price maybe ?
The original goes for around RM17X~RM20X for the usual hobby stores around here (due to increase in Yen exchange rates). This normally goes for around RM7X~RM8X. So it is roughly 1/3 of the original for my location. If you're lucky you can get it for 1/4 of the price (or lower) but that is normally at supplier's price.
you might wanna try the new bootleg called dragon momoko. i can say its has less problem than this tt hongli.
Post a Comment