
 Price: RM3X
Time for the next review~ TBH, I was pretty excited when building this due to reasons as you read on the review, although more obvious in the second part later. Even if this is the second time I'm building practically the same kit and fourth time building a 00 Gundam, I don't feel any quirks about that. Now, onto the review.
The price this time is higher than usual but it seems the prices of bootlegs have increased lately so there isn't much I could do about that. Fortunately, it is still relatively affordable, especially for what you'll find inside the box and my impression on it proves positive.
You may read my previous review on the original Bandai version of his model kit here which covers some information in regards to the Gundam itself as well. I won't be repeating it here.
Specifications
 I find it amazing that Gao Gao/TT Hongli is getting better with their Engrish, seriously. It makes building easier as the instructions have Engrish words that are understandable by the very least.
Originally Posted: 8 September 2011
Latest Update: 25 January 2012
Reason: Realization of Incomplete Review
Read on for the rest of the review~
Section 1: Box


 The way they did the box this time was slightly different than usual yet doesn't go far off from the original. At least the text (not all) stays on this time, although translated into Chinese/Engrish.
Section 2: Box Open!

 As usual, they pack everything into one plastic bag. As much as it is cost driven, there is a chance of parts scratching and parts falling off the runners so be wary because of this packaging choice.
Section 3: Manual Scans
Check out the gallery over at my Imgur album HERE. You better read it for some laughs or maybe even be impressed while you do.
Section 4: Runners


 Note: Only took closeups of runner A as an example. If you can see it properly, the plastic quality is admirable but could never be at the same level as the original - Bandai.


 Color accuracy is top notch this time. I can say that it is at least 99% accurate to the original. you can observe that in the second part alter when I compare the bootleg to the original.
The overall plastic quality is 90%~ I'd say with a matt finish for most parts. The plastic texture is not completely smooth but the rough outcome isn't so noticeable unless you touch and look up close (some parts are smoother than the other as it seems the company can't evenly produce the parts yet). Shouldn't be a problem if you sand down your model kits as the details, as far as I can see myself, are intact.

 The polycaps are hard and tight which will be evident in the second part as to its benefits. The stickers are complete fail as Gao Gao missed their target... even if they do stick this time.
Section 5: Building Process
 As usual, I painted the clear parts. For the Gao Gao 00 line, I normally paint them red to tell you and me it isn't the original as well as the fact that red looks nicer IMHO. I used the Sangokuden Gundam Marker Metallic Red for this, half shaken.

 Since the eye sticker cannot be used, I have to paint the eyes myself. I put down the red paint first before using a permanent marker to do the black portion. You'll have to shake the metallic marker completely if you want the eyes to shine.
Other than the clear parts painting, you'll need various other extra tools such as superglue and/or modelling cement for loose parts, a modelling knife if you don't normally use one to trim some excess edges that you may come across and a diligent will to finish the model kit. It won't be easy and a smooth ride. Bootlegs, as much as they can be praised to be "90%~ of the original", the 10%~ tells you that there are some inconsistent flaws you'll have to bear.
Okay, onwards with the meat of this review. I'll hint that hard and tight polycaps makes building this one harder and requires more force to put some parts together (especially ball joint areas).
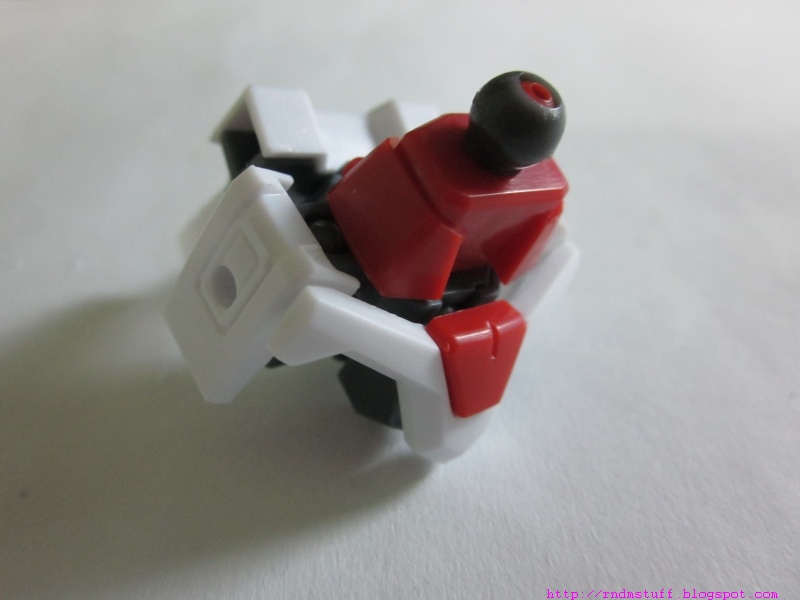
Section 5.1: Torso


 I sharpened the chest fin to make it slimmer and less obstructive to the head later. Other than that, the body came together as per instructed but the hard polycaps made putting it together, quite tough. The two halves of the torso doesn't completely shut tight though.
Section 4.2: Head

 Just a simple paint job for the eyes.
 The red looks nice... Do note that I sharpened the V-fins as well.
 The head section has a lot of problems. The V-fin and the rear headpiece didn't want to stay in. The mouth piece that connects to the chine and eyes poke through too easily. I didn't want this to be a permanent fix so I used blue-tack to make the parts stay together. This section seems to be the only one with the most problems overall for some odd reason. If you used superglue or cement, I think the head will stay together just fine.
Do note that I'll only detail the model kit partially (minor) due to future plans going for it.
Section 5.3: Arms


 The only problem with the arms is that the upper section didn't completely connect to the shoulder gray piece as you can see the small gap there. It doesn't seem to cause any problems though as the overall connection, once you put the arm together that is, is pretty tight and made me quicken my pace to finish it. I had some hope because of how tight the connections are feeling at this point.
I also like to point out that putting the stickers under the orb makes it harder for the orb to stick on as the sticker makes it jut out and kinda want to fall off. Thus, you either trim the stickers, make the orbs smaller (risky) or don't use the stickers at all.
The open palm, unfortunately, didn't want to connect to the white armor piece peacefully so I had to mod the connection a bit so that it'll stick on, otherwise, it connects to the arm no problem.
Section 5.4: Legs


 Building the legs are the easiest. The only problem the the thigh armor not wanting to completely "sit in" but it doesn't cause any real problem asides from that.
Section 5.5: Waist


 Only problem is the rear waist armor and beam saber hilts can fall off easily if you fumble with em' too much. Other than that... ball joints are hard to connect due to the tightness. ^^;
Do note the articulation points for those who are not familiar with the 00 model kit. Lots of capable movements there!
Section 5.6: GN Drive

 Putting together the GN Drive is straightforward but attaching it to the back prove to be challenging due to how tight the polycaps are. Yes, I'm repeating the same problem again and again but that's the truth.
Section 5.7: GN Sword II Blaster


 No problems here.
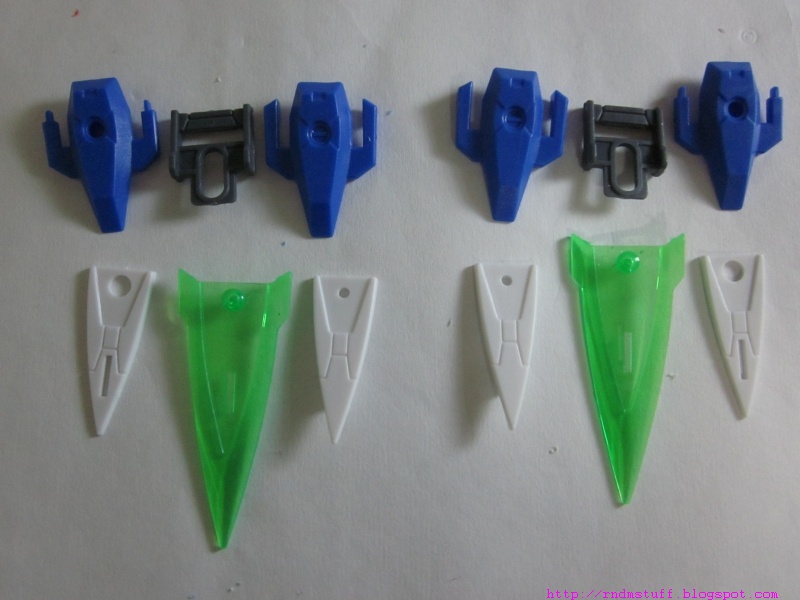
Section 5.8: GN Buster Sword II
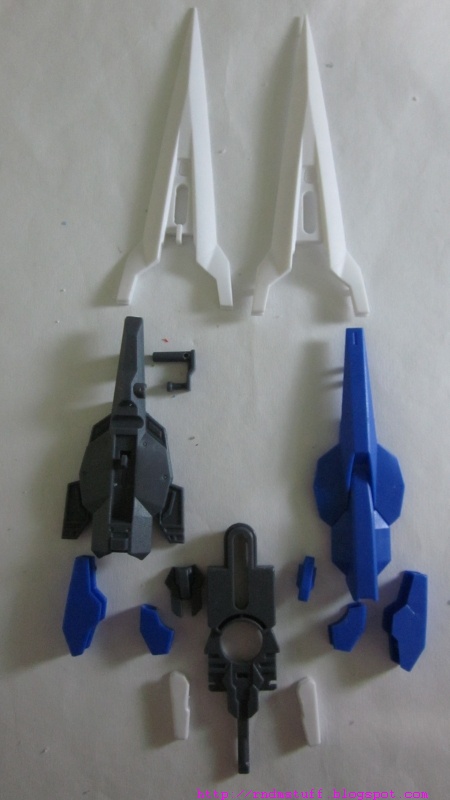


 No problems here either... if you want weapons, you may want to look for this bootleg kit, I'm impressed. Take note that the buster sword can open up as shown. The two blue pieces at the sides require part swapping though.
Section 5.9: GN Sword II - Long/Short


 Tighter than the original so expect some fuss when you change from sword to rifle mode and vice versa. The wire connects quite fine for this model kit but the tip of the short sword is still... flimsy. ^^;
Section 5.10 - GN Katar
 Construction is fine but pulling the handle out takes some effort and... fingernails.
Overall, I can say that the building experience is mostly painful because of the hard and tight polycaps. The plastic parts are quite alright except for some deviations such as at the head section foremost. Other than that, it was an okay ride when building. A little bit of challenge makes it all the fun to build unless you're not into the challenge of building that it. Then again, this model kit can be built straight-up without any kind of more experienced skills. (I may repeat this in the second part later...)
Section 6: Preview (Updated with Info)
Note: All preview shots were uploaded on my FB account as I was photo-shooting it (thus no watermark) and were taken with my Samsung Galaxy S II. I'll elaborate more on these in the second part later. But these shots give a great impression on the final build, no? :3

When it comes to holding the heavy weapons, this model kit doesn't have much problems. Heck, it fares better than the original did. This is mostly due to the tighter joints of the model kit. The only problem here is the peg connection from the buster sword/blaster to the forearm. You may want to reinforce it by using superglue/cement on the two halves of the forearm or increasing the peg breadth with the superglue trick.

Although it is a bootleg, it has no problems posing like the original at all. It may even surprise some of you even.


If you own a HG 00 Raiser model kit, you can use the combined handles as such (plus requiring another HG 007SG) as the sturdier, tighter joints of the bootleg allows these possibilities effortlessly!

Finally, you can go mad by wielding the buster sword with one arm. It probably won't last long but that shouldn't stop you from doing something like this, no? Note that you'll need another HG 007SG if you want to emulate this awesomeness.
Eh, I just noticed I didn't actually finished this review with a second part like I usually do... which feels weird because I felt like I have already done it (or it could be the delusion due to being distracted by real life issues). o_o;
Since I've already did a few things with the said model kit, I think the only way for me to conclude this is assuming the "preview" shots above paint a good enough picture. ^^;;;
Pros
- Stickers stick like normal but mine were printed with a large margin of error however...
- Tight, sturdy joints/polycaps.
- Mostly matt plastic mold.
- Can hold up heavy weapons without much problems while being better at it than the original.
- Pegs for weapons that connects to the forearm are loose.
- Sometimes when thing are tighter does not mean it is always better like the katar pegs are stuck to the katars.
Overall a VERY good bootleg although late of me to properly conclude that as the local shop officially ran out of this a while back. =/
Well, at least I updated this review somewhat. Better than leaving it hanging. o_o;
Seriously, I didn't continue this review last time? This calls for some photo-taking action later - to properly update this review. ^^;
This review is continued here~

3 comments:
hmm you buy bootleg despite having the original ? ^^
Yep other than needing the base body for a future mod plan. I was pleasantly surprised though.
Hi sir can you send me your manual scan. I lost mine. Thanks
Post a Comment