Now, to post something other than Daicon 2009. XP Final post of Daicon 2009 coming up next as long as my Internet connection holds up by then. X.x
I bought this earlier this month right after my exams were done. I just really could not pass up the this model kit. I simply love the Exia. Damn you Bandai and your ridiculously good marketing scheme! D=
At any rate, the Gundam Exia Repair II or simply Exia R2 appears at the very last episode of Gundam 00 Season 2 for a final showdown with the final boss... more on that when I get the other model which pairs up with the Exia R2.
Unlike the original Exia, the R2 only comes with three swords, namely the GN Sword Kai and 2 GN Beam Sabers. With that, the R2 is slightly lighter than the original. Why is it called "Repair II". Well, the reason is that there was a Repair version of the Exia in the very first episode of Gundam 00 Season 2 which had only one arm and one weapon, a broken GN Sword. The Repair I was badly damaged by the end of episode 1. Somehow, Celestial Being engineers managed to overhaul the Exia.
Pilot: Setsuna F. Seiei
Height: 18.3m
Weight: 56.9t
Armaments: GN Sword Kai, GN Beam Saber(2), GN Shield
Read on for the full review and n00b painting attempt. =P
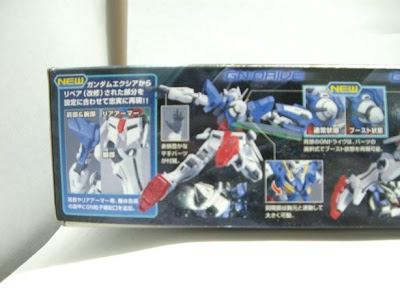
Part 1: Box


Part 2: Box Open!


Part 3: Runners
 One new runner, no more rubber runner and a new foil sticker sheet. That's the differnece between this and the the original Exia.
 Sticker sheet is slightly different as there are no visible GN Cables(blueish-purple parts) anymore.
Part 4: Building
Part 4.1: Extra Effort & Trying New Techniques
Since I painted the original Exia quite a bit, I simply cannot build this model kit straight out of the box. It is required of me to paint some parts of it as well to make it look more color acurate to the anime. =P
Of course, since I only have Gundam Markers, a stationary knife, a normal paint brush and a "metal sheet", the painting is not so smooth and clean as like other more well equipped people can do. At any rate, I'm quite happy with the result, even though it looks a bit bit dirty(giving it an "old & used" look).
 These parts must be painted. I just use an unshaken metalic green Gundam Marker. If you don't shake the markers, the paint will be translucent for most of them.
 This time, I tried to paint the shield. However, it doesn't look so nice but semi-acceptable to me. You'll see the final result lower down.
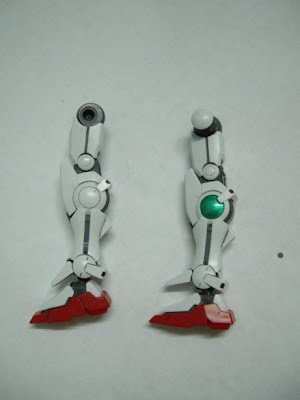
 Painted the parts of the legs gray. You can however just panel line the sides of the "crevasse" instead.
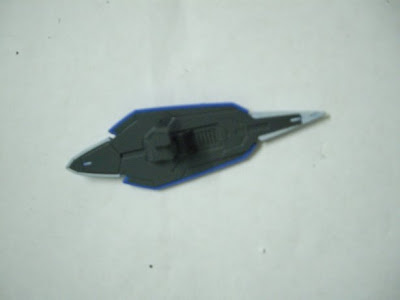
Part 4.2: GN Sword Kai(Kai = Custom)


 I failed to make the paint look nice on the circular part of the shield part of the GN Sword Kai as it ended up shiny. I think it was caused by me not shaking the marker well enough whenputting the second layer. Either that, the paint was too thick. =/
Well, at any rate, I hope it doesn't look too bad. If I have some more time with this kit, I might try to fix the part later on. But for now, laziness. XP
Also, I simply love the green blade edge of this weapon! =D
Part 4.3: Shield, Torso & Head
 Next step for the shield. The first layer of white. I tell you, it is VERY hard to make white paint look nice on dark colored parts. It takes many layers until you cannot go further as too many layers of paint will spoil the colored area.
 Remember, when tired, stop! I was a bit tired when I did this part until I painted the wrong side! Gack! Grave mistake there. I had to strip the paint but it didn't strip very well as I left the paint to settle in onto the plastic for a while before I noticed the mistake. D= I did manage to strip the paint of, though the part looks a bit messy after that. Luckily, only the small pieces were wrongly painted. Phew.
Part 4.4: Arms
 I tried something new this time, I painted the insides of the shoulder armor gray. But, I made a mistake and painted the connector for it to connect to the arm. This causes difficulty for me to move the arm up and down. Oops. ^^;;
Part 4.5: Shield, Again


 The panel lining didn't look so good because I did it when the paint hasn't settle on the plastic very well yet. Then again, my hands were aching at this point of time and already started to shake. With that, I stop there as to not further make any worse mistakes. ^^;
Part 4.6: Legs
2 days later, I finished up the rest of the body and did a quick photoshoot.


 The legs didn't require much painting unlike the top part of the body. Makes me feel like I should had taken a break after I finish the head + torso. ^^;
Part 4.7: Waist
Part 5: Exia R2
Part 5.1: Up, Left, Down, Right With Exia!


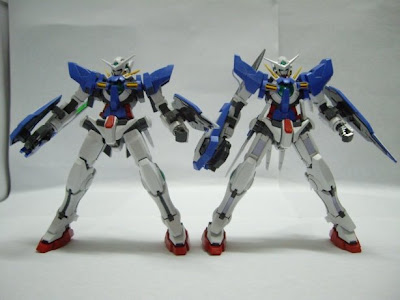
 You thought the changes were minor? No way! Even though at simple sight they look virtually the same but the R2 has some major improvements over the original. Most noticeble are the thrusters which Exia sorely lack earlier on. Furthermore, the weapons are less excessive now and easier for the Exia to hold on. I tell you, it is pretty hard to pose with the GN Blades rested on the sides. ^^;
Adding to that, the R2 has a more detailed GN Drive, since it is in "open" mode in which Setsuna used it to add mode thrust to the R2 for a final attack... The R2 also comes with the GN drive in "close" mode which I didn't bother to cut and paint.
Part 5.2: Articulation Test

 You can turn it 360 degrees if you want, but its not suppose to turn so much anyways. Sadly, the hip joint is not the same as the 00. Its basically the same as the original, except now there more parts, connections and less painting. The articulation of the legs only improved a little, though not major enough.
Part 5.3: Action


Part 6: Conclusion
Well, as a model kit, it is slightly better than the original. The leg design is much better IMO. The value of this kit is also better with the clear green part for the GN Sword Kai. This makes me feel we have been ripped by Bandai with the original HG Exia... XP
If you haven't bought a HG Exia, I recommend you to buy this version instead. It comes with all the runners that the original Exia had minus rubber parts and you can virtually make it from the runners that came from this kit. Furthermore, all the original Exia weapons are here, including the blade for the first GN Sword.
Hopefully, Bandai will MG this kit soon since the MG Exia is already underway. It shouldn't be much work for Bandai unless the inner working of the R2 really did get a major overhaul. =P
The lowest price you can get for this kit normally is RM45 and you should try not to buy it for more than RM55. ^^
Of course... its counterpart is more delicious and very well articulated. I'm so going to get that soon, once I have some more money in hand that is... >_>;


6 comments:
you are pretty lucky in terms of tools,bro.living in a small town,and the nearest city is sibu,which i would say it lack of choice in terms of modeling tools,not to forget that i as a student have limited budget really stress me out.i only use a cooking scissor,no kidding,knife,some yoko-yoko,5 permanent markers & a dried out panel line marker.not to forget side cutter.btw,im a loyal reader of your blog,so keep it up bro!!
does the elbow joint hold up?
The joints are made of ABS plastic so the arms hold up pretty fine. Over time, however, is another story. So far, all my HG Exias have no problems holding up their GN Sword arms yet.
Are there stick for the face like the grey sticker on the side of his face I NEED TO KNOW
THE STICKER ON HIS FACE IS THE MOST IMPORTANT PART
Although this comment is belated, I painted the grey sideburns of the faceplate using Gundam marker.
Post a Comment